SVN服务器部署
安装SVN
yum install svn创建仓库
- 分别创建目录和以目录创建对应仓库
mkdir -p ~/svn/test
svnadmin create ~/svn/test
ls -al ~/svn/test
total 8
drwxr-xr-x. 8 root root 112 May 10 14:25 .
drwxr-xr-x. 4 root root  36 May 10 11:25 ..
drwxr-xr-x. 2 root root  54 Jun 28 10:07 conf
drwxr-sr-x. 6 root root 253 Jun 28 15:34 db
-r--r--r--. 1 root root   2 May 10 10:44 format
drwxr-xr-x. 2 root root 226 Jun 28 14:09 hooks
drwxr-xr-x. 2 root root  41 May 10 10:44 locks
-rw-r--r--. 1 root root 229 May 10 10:44 README.txt
drwxr-xr-x. 2 root root   6 May 10 11:52 server
drwxr-xr-x. 4 root root 75 May 10 14:25 .svn- conf目录是svn服务器的配置目录
-rw-r--r--. 1 root root 1080 1月 30 13:26 authz      #权限控制
-rw-r--r--. 1 root root 309 1月 30 13:26 passwd      #密码管理
-rw-r--r--. 1 root root 3090 1月 30 13:26 svnserve.conf    #SVN服务进程配置
配配置
- 权限配置:
~/svn/test/conf/authz
#用户分组(root->管理员,developer ->开发 other->其他)
[groups]
root = qill  #管理员用户qill
developer = fon,jdom  #开发用户fon,jdom
other = ceshi,cehua    #其他用户ceshi,cehua
#权限配置
[/]
@admin = rw  #管理员读写权限
@development = rw  #开发读写权限
@other = r        #其他读权限
test6 = rw #test7用户读写权限- 密码:
~/svn/test/conf/passwd
#密码配置,格式为用户名=密码,密码为明文
[users]
qill = 123
fon = 123
jdom = 234
ceshi = 456
cehua = 789
test6 = 12341234xiangshouge
- svn服务配置:
~svn/test/conf/svnserve.conf
[general]
anon-access = none # 匿名用户无权访问
auth-access = write # 认证用户可读写
password-db = passwd # 指定用户认证密码文件
authz-db = authz # 指定权限配置文件
### This option specifies the authentication realm of the repository.
### If two repositories have the same authentication realm, they should
### have the same password database, and vice versa.  The default realm
### is repository's uuid.
realm = /root/svn_test/test ## 仓库描述,设置成对应目录就好
### The force-username-case option causes svnserve to case-normalize
### usernames before comparing them against the authorization rules in the
### authz-db file configured above.  Valid values are "upper" (to upper-
### case the usernames), "lower" (to lowercase the usernames), and
### "none" (to compare usernames as-is without case conversion, which
### is the default behavior).
启动服务和连接
- 启动服务
svnserve -d -r ~/svn/test --listen-port 3690连接服务
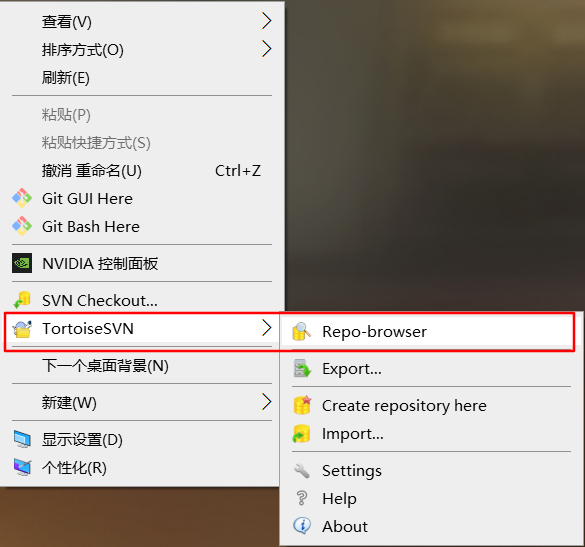
windows客户端选择浏览仓库

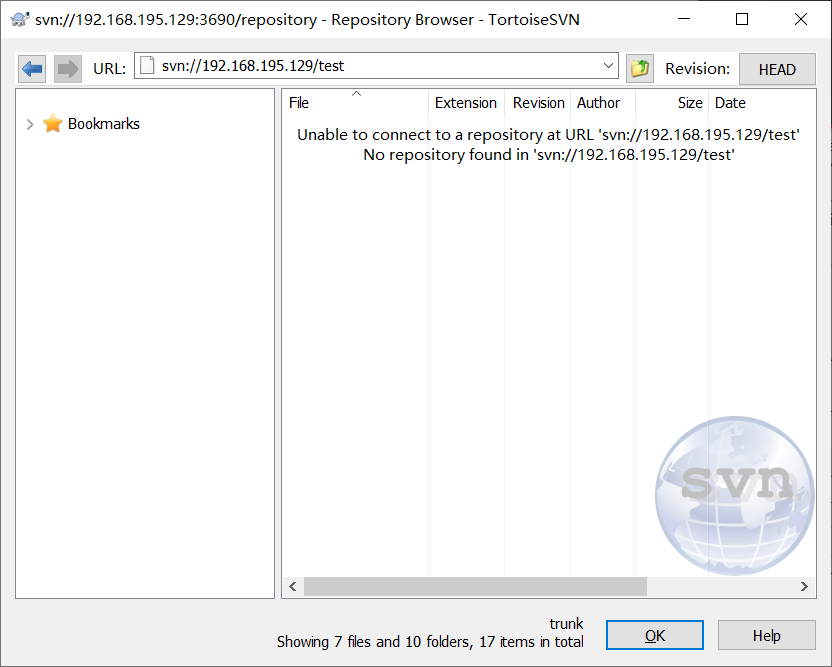
输入对应url,svn://ip:端口/仓库目录名

连接成功,可以看到一个新的空仓库

4.后续就是对应的检出、提交等流程就不写了。
至此服务已经搭建完成。有一些其他的事项需要注意。
或许会遇到的蛋疼的问题
- windows的svn客户端连接svn会卡死的check list
- windows的防火墙关了没有
- 服务器的防火墙关了或者设置了没有
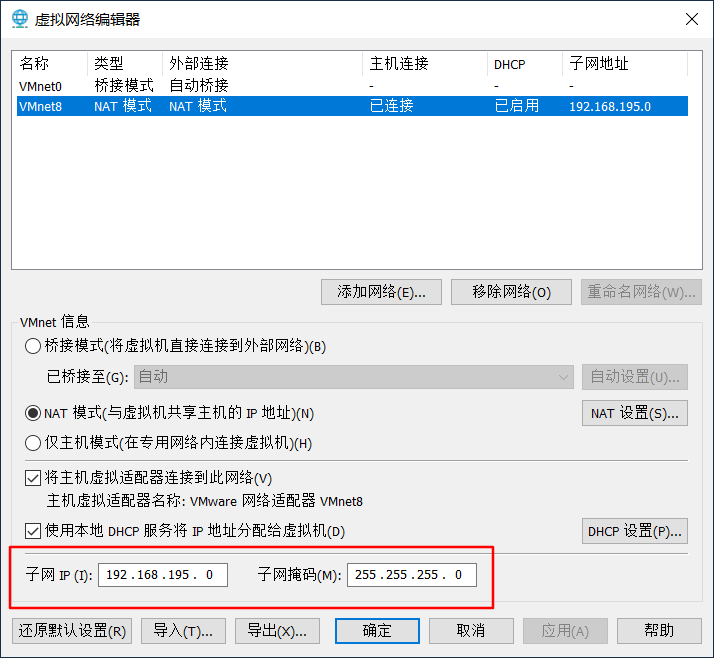
- 如果服务器是虚拟机,虚拟机的网卡是否用了NAT模式
- linux关防火墙
1:关闭防火墙

systemctl stop firewalld
2:开启指定防火墙
#开启3690端口
firewall-cmd --zone=public --add-port=3690/tcp --permanent
#刷新配置
firewall-cmd --reload- 虚拟机的虚拟网卡NAT模式

自动检出
- svn的做法是将提交的存入数据库中,所以如果想要直接看到对应的提交可以编写
post-commit脚本来做自动检出
svn checkout svn://127.0.0.1/test /data/test #svn://127.0.0.1/test表示需要检出的仓库地址 /data/test表示需要检出到哪个目录下- 自动检出配置:
/var/project/test/hooks目录下新建一个post-commit文件,post-commit文件添加内容为:
#!/bin/sh
REPOS="$1"      #仓库
REV="2"        #版本号
export.UTF-8      #编码
SVN=/usr/bin/svn  #svn地址
WEB=/data/test  #要更新的项目目录
SVN update $WEB --username qill --password 123 #--username qill表示设置用户名 --password 123表示设置密码
# 将post-commit设置为可执行
chmod +x /var/project/test/hooks/post-commit
到此自动检出配置完成,不过注意,第一次的时候需要手动检出,之后就不需要了,到此linux搭建svn服务器完成
SVN服务器部署
https://qiil.github.io/2021/06/28/SVN服务器部署/